Introducing Group Invites, now you are able to build communities faster and onboard new users lighting-fast!
We make it easy for administrators and users to invite people to join specific groups, and allow first-time Pronto users to join their Pronto organization. You can add people directly to groups so they can collaborate with your teams.
We hope this new functionality will help you enjoy better collaboration among your groups and take your Pronto experience to new levels!
If you have any questions about our new releases and updates, feel free to contact support. If you’re new to Pronto, request a demo and we’ll show you what we can do!
Enjoy our comprehensive guide to our new and updated platform.
Main Features of Group Invites
Group Invites allow users, managers, and admins to generate a URL that can be shared with either current members of Pronto or first-time Pronto users that need to get invited to the org. Just generate the URL and send them to the user you want to invite. Then all they do is click on the link and they’re in.
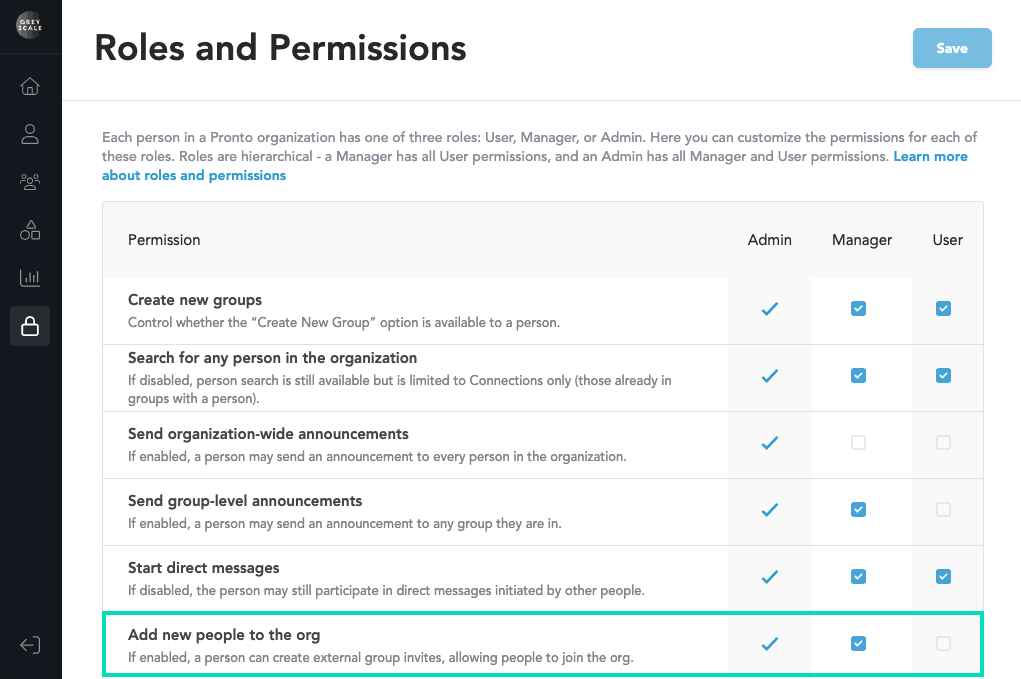
By default, only admins can add new people to the organization. However, administrators can modify this to give access to this function to managers and/or users. Whoever has permission to add new people to the organization can create external-facing group links.
You can easily add and manage people through a series of easy-to-follow menus, drop-downs, and pop-ups. Pop-ups appear to validate the action you wish to take because some functions are undoable once you perform them, like removing someone from their groups or from the platform.
Give Specific People Access to Specific Groups
Administrators can give access to certain staffers for whatever groups they should belong to.
For example, the general manager can have access to the teams associated with the sales manager, technology manager, marketing director, and production managers. However, the sales manager only has access to the groups associated with sales because that is his department.
This gives your organization a way to manage access to certain groups based on the involvement of your people. Not everyone should have the same access to every group. If people are added to your team or they leave, your administrators can add and remove new members as needed very easily.
 How to Invite Someone to a Group
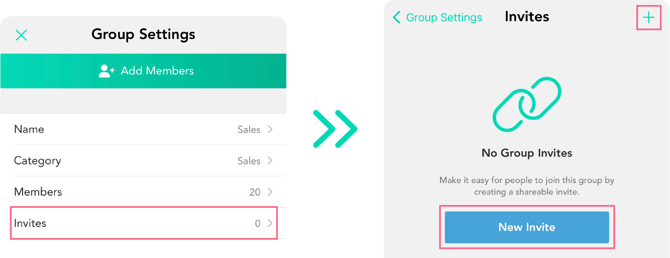
Create Group Links under Group Settings, either with:
- Add Members button > Invite with a link,

- under Invites > New Invite.
Create the Invite & Set Parameters
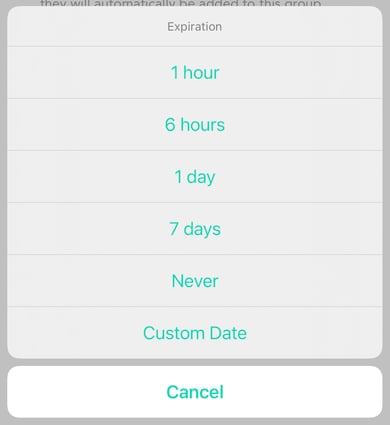
The first thing you’ll see when you invite someone to a group is setting the link’s expiration. This gives your invitee a certain amount of time to respond to the invitation.

Once you click on Expiration, you will see options for expiration in 1 hour, 6 hours, 1 day, 7 days, never, or set a custom date.
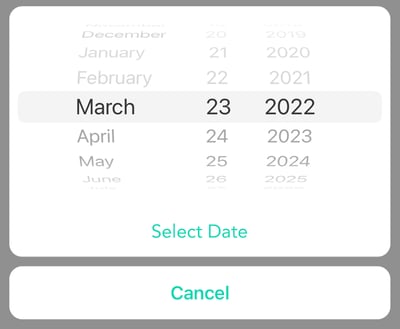
If you select a custom date, you can pick a date on the calendar at some point in the future.
Your invitee will receive an email with the link, and a message stating when the link expires and how to request access again if they don’t click on the link in time.
Giving People Access With a Single Link
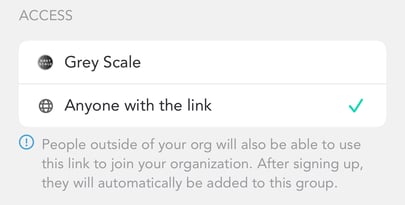
The next thing you will see as an Administrator is the Access settings. Only users with Add new people to the organization permissions will see the option ‘Anyone with the link’ when giving new people access.
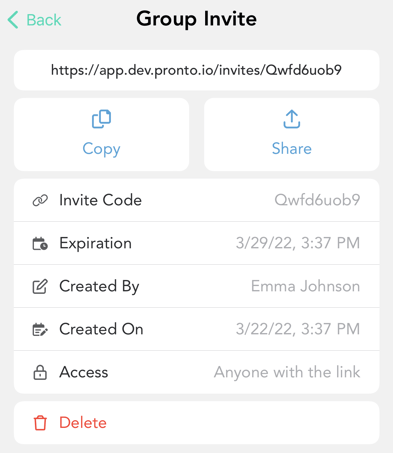
Once you have set the link permissions, you can click Create and another screen will prompt you to copy the link, share the link, delete the link, and see all the settings associated with the link, such as the expiration date, who created the link, when it was created, and the name of the organization associated with the link.
For a video walkthrough of Group Invites’ functionality go here.
